I prepared my first pollen slides during my Master studies, in 2009. I have been introduced how to pipette a portion of the sample and mount it between a slide and cover slide. Some colleagues don’t necessarily seal their slides before analysis, but I personally like to seal them to prevent any leak. This is important to me since I mount pollen samples in glycerine, and it is difficult to get rid of it completely if it ever touched the optic of the microscope.
I first used nail polish (!) to seal the cover slide. I never found it neither nice—I don’t like its smell, and it gives me headache—nor effective: the nail polish would eventually break, thus failing at its original mission. Later, during my PhD studies, I discovered a mixture of pine and bee waxes. The proportion of the ingredients will change the properties of the final product. The more the pine wax, the more back and hard it will be; the more the bee wax, the more yellow and soft. This is a good alternative to nail polish, however, the molten wax is deposited on the edges of the cover slide after the sample is mounted. Too often the sample would reach the edges so fast that it would actually spread outside of its supposed area 🙁
More recently, I saw someone preparing reference pollen slides. I knew reference slides since years but never wondered how one achieves such long-term preparation, although it is exactly what I look for. Here is the secret: reference pollen slides are mounted with paraffin wax. I studied a bit the process and I adapted it to my needs. Following is a description of my method.
Paraffin wax is solid at room temperature. I store it in a small metallic box, such as those for candies. When I want to prepare slides, I put this box on a portable stove. It doesn’t need to be particularly hot. I use a temperature around 80–90 °C. This is enough for the paraffin wax to turn completely liquid after a few minutes. But this is also enough to burn your fingers, so watch out! Then, I use a small copper stick to deposit a bit of paraffin wax on a slide, in such a way to limit a rectangular area. Ideally, an area of the same dimensions than those of your cover slides 🙂 The paraffin wax will quickly cool down on the surface of the slide. In the centre of the area, I drop a bit of my actual sample, and cover it with the cover slide. And then it is time for the magic to happen: I place the slide a few seconds directly on the stove. This is enough for the paraffin wax to melt again. The cover slide will adjust properly while the sample gets to the edges, but the paraffin has everything closed already! Eventual bubbles of air trapped between the slide and the cover slide will easily escape outside.
The result is perfectly clean. There is no material on top of the cover slide, assuring a thin slide that would never touch the optic of your miscroscope. And it rarely leaks! But it can happen, that’s right. Most of time it is due of too little paraffin was deposited. It is hopefully easy to fix: drop more paraffin wax on the faulty edge, and heat the slide a few seconds on the stove again. The additional paraffin wax should beautifully merge with the original one, and push the sample material back underneath the cover slide.
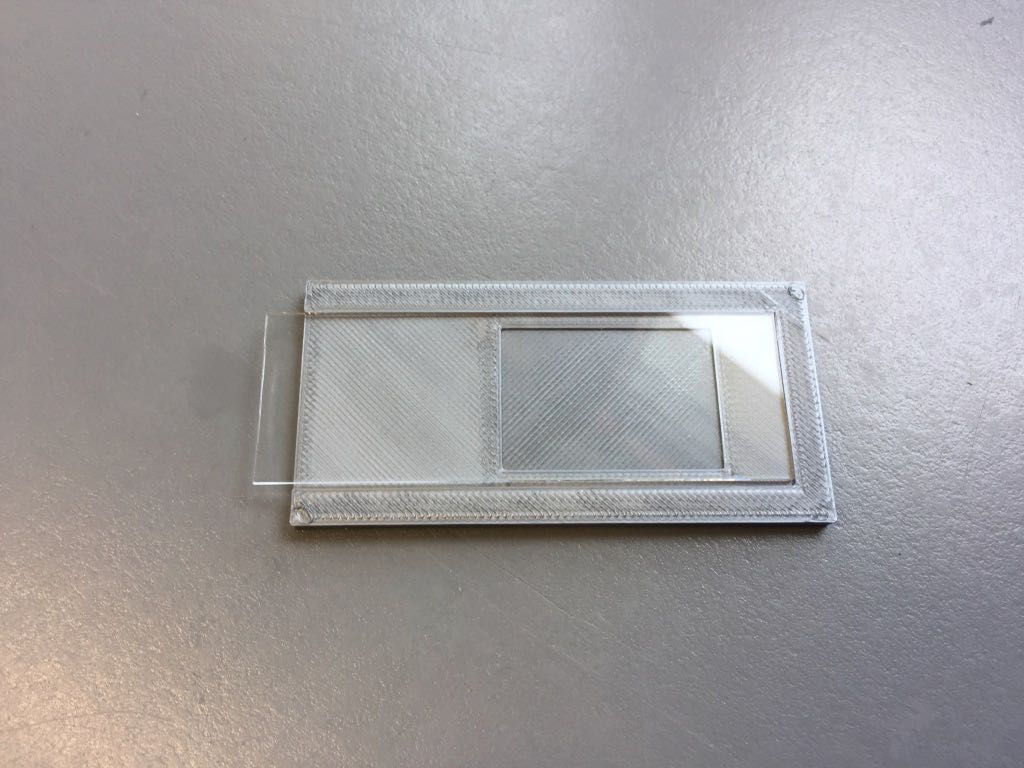
Now, since the paraffin wax must be deposited on the slide first, it is important to know where exactly. For this, I designed a particular slide holder. When a slide is laid on this holder, you can see through it the area of the cover slide you should circumscribe. Easy!
And you, how are you preparing your (pollen) slides?